In A Perfect World Of Straight. Plumb and Square You Wouldn't Need Most Of These Finish Carpentry Tips.
Welcome to the real world of uneven corners, out of plumb walls, up and down floors and wouldn't it be nice if the trades men before us actually had squares that were square.
Well the true craftsman has a way of dealing with all this kind of crap.
I found this great article over at The Home Handyman and I'd like to share the best finishing tips.
Close The Gap In Miter Joints
Here's a trick few know about.
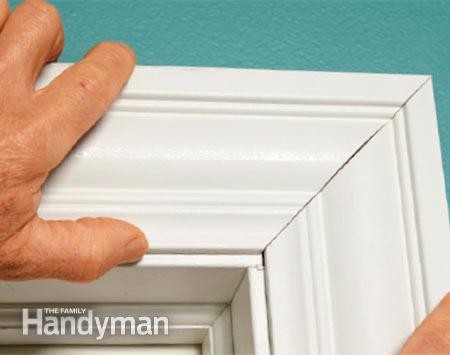
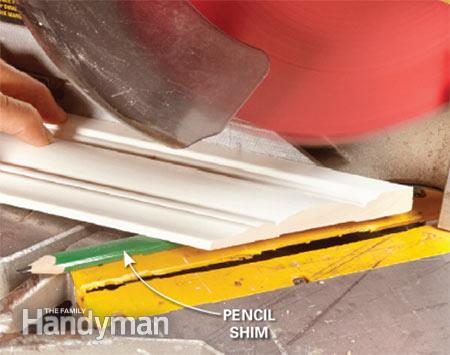
“Problem: An open miter
This doorjamb protrudes a bit beyond the wall, and the result is that the trim can’t lie flat and the front of the miter joint can’t close.
Uneven walls or misaligned jambs make it hard to get tight-fitting miters. If your miter has a consistent gap at the front, there’s a good chance that putting a slight back bevel on both moldings will fix the problem. If you own a compound miter saw, you could tilt the saw about a half-degree, but that requires fussy adjustments.”Solution: Cut a “back bevel”
You could tilt the saw blade to back-bevel the miters, but tilting the trim is faster and easier. Slip a pencil or shim under the molding, just behind where the cut will be. Cut both sides of the miter with shims in the same position. Then test the fit and make adjustments as needed.
The quickest and easiest way to cut a slight back bevel is to shim the molding so it’s resting at an angle to the saw blade. A pencil makes a handy shim and is just about the right thickness. You can adjust the position or thickness of the shim to compensate for all kinds of wall variations. You can even shim just the back or the front to mimic how the trim rests on uneven drywall.”
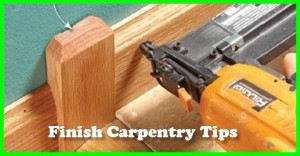
Miter Saws Don't Cut Angles Larger Than 45 Degrees
This is not a common cut but it occasionally is needed.
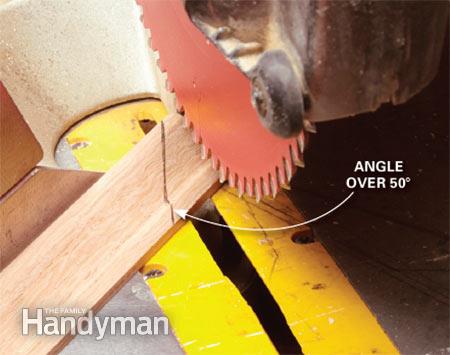
“Problem: Miter saws don't cut steep angles
This miter saw won't cut the 60-degree angle we need.”
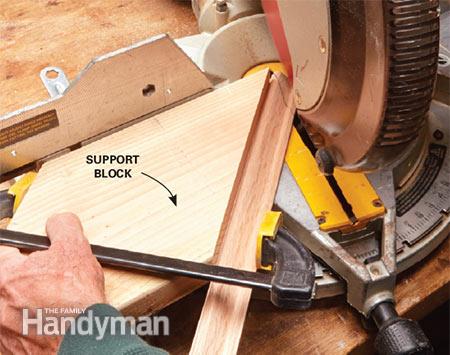
“Solution: Clamp to an angled block
Cut a block of wood at a 45-degree angle and cut a flat spot for the clamp. Clamp the molding to the block and line up the miter saw with the mark to make the cut.”
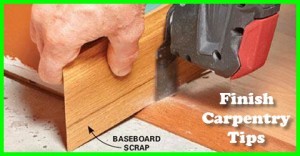
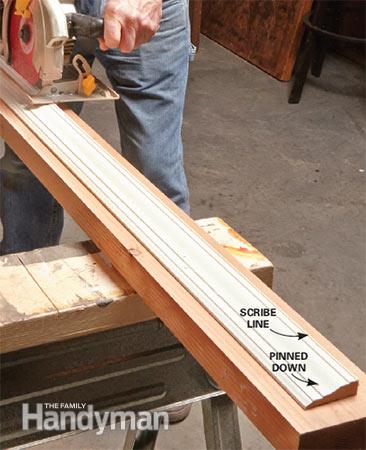
Trim has to be scribed to fit a wall
There are times when a casing is wider than the spac between the door frame and the adjoining wall. The casing in this situation has to be cut down to fit tightly to the wall.
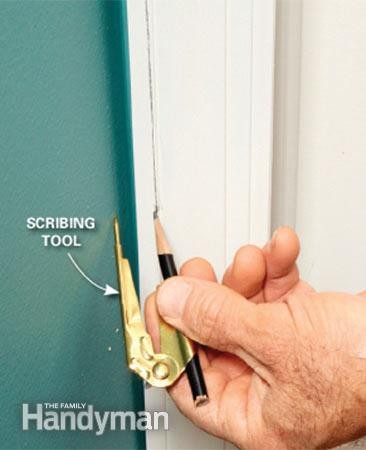
Solution: Step 1 – Scribe a line on the casing
Set the scribing tool to the distance between the wall and the mark on the casing. Scribe a line by running the point of the tool against the wall, being careful to keep the tool perpendicular to the wall.
Solution: Step 2 – Cut along the lines
Next, remove the molding and tack it to a board. Carefully saw along the line with your circular saw. Stay a little outside the line. Then finish up by belt-sanding or planing up to the line.
A table saw works best. Tilt the blade in the saw 15 to 30 degrees to make it easier to plane to the line.
Learning how to scribe moldings to fit tightly to uneven surfaces is a vital trim carpentry skill. And once you get the hang of scribing, you’ll find all kinds of situations where it’ll come in handy. Here we’re showing how to fit a casing against an out-of- plumb wall. You can also scribe door bottoms, inside corners of wainscoting, and even shelving or cabinets that abut crooked walls.
There are several types of scribing tools, but the simple compass with a wing-nut lock shown is a favorite with many trim carpenters. The second photo shows how to use the compass to scribe a line. Then finish up by cutting and trimming to the line for a perfectly fitting piece.”
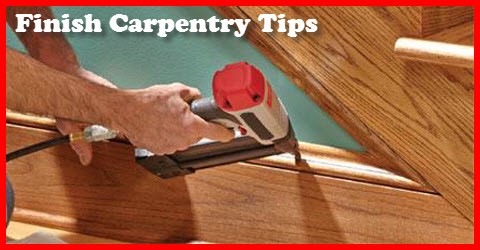
How To Close A Gap Between The Baseboard And The Wall
This is a common problem. The gap seems impossible to close because there is no stud to nail to.


“Solution: Nail into the plate
If there’s no stud where you need to pull in the molding, drive an 8d finish nail at an angle into the plate. In hardwood trim, drill a pilot hole. Use a hammer and a nail set to set the nail head slightly below the surface.”
There are more great tips in the source article.
Here are some more finish carpentry tips — Click Here ––