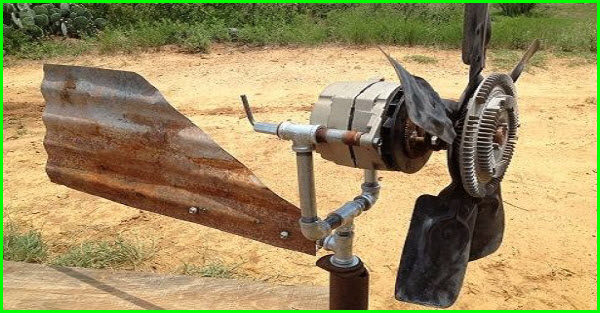
Here are The Steps To Assemble This Wind Generator
This is a great little machine especially if you have a windy location to mount it.
You can always build a second one or more to increase the power you get.
The guy who wrote the original article found in Mother Earth News also uses a solar panel to increase the power output to his battery storage.
Don't put all your power eggs in one basket so to speak.
Here's the assembly part from the original article.
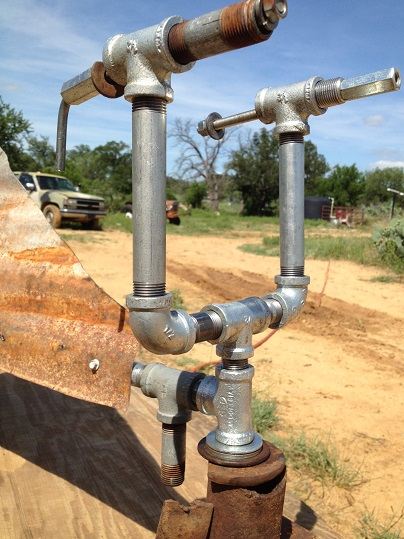
Bracket Assembly For Mounting Alternator
If you have a welder, making a bracket is simple. I used 1″ square tubing for all the bracket pieces and a 2-feet long piece of 1″ pipe for the Rotating Stem that fits inside the pole. If you don’t have a welder, fear not. The Bracket Assembly can be fitted up with 1/2″ galvanized pipe and fittings. Here’s a list of the pipe fittings you’ll need:
1/2″ Tee (5X)
1/2″ Elbow (2X)
1/2″ X 12″ Nipple (2X)
1/2″ X 6″ Nipple (2X)
1/2″ X 1-1/2″ Nipple (2X)
1/2″ X 2″ Nipple (2X)
1/2″ X Close (2X)
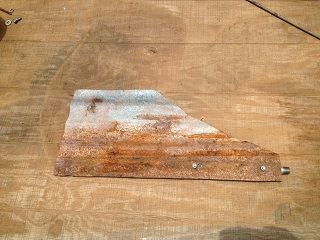
A tail fan to spin the generator around lining it up with the wind’s direction must be attached to the 12″ nipple at the back of the bracket. Cut a fan out of old tin siding or roofing with tin snips or a cutting torch. A right angle triangle shape works best. Drill three holes in the nipple. Use self-tapping screws (steel roofing screws work good) to affix the tail to the nipple.
(See photo)
Tower/Pole – I used an old Television antenna tower 20′ tall with a 2-1/2″ diameter pipe top piece. You’ll also need a Stop at the top of the tower which lines up with the Stop on your bracket assembly. This can be welded or bolted onto the tower. The Stops will only allow the generator to turn 360° clockwise and counterclockwise so your cable doesn’t get twisted around and around the pole/tower.
A joint of 2-3/8″ oil field tubing anywhere from 10′ to 20′ in length (height) attached to a building or bolted to your truck bumper makes a good tower. Make sure it is secure and you may need to use guy wires. If you aren’t sure how to mount the generator, send me a message and I’ll try to help.
Fan Clutch to Alternator Attachment:
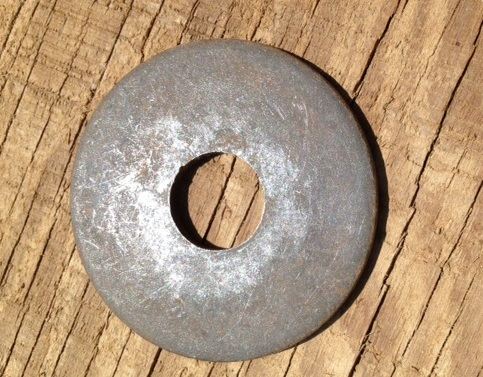
The fan clutch hub can be welded directly to the alternator hub, just make certain the fan is perfectly straight in line with the alternator shaft. Make sure the alternator’s built-in wire plug ins are located on what will be the bottom of the generator. If you don’t have access to a welder, create a union from the 3″ washer and four bolts, which will fasten the two major components together. Drill four holes to match the holes in the fan clutch. Use a 1/4″ tap to cut threads in the holes. Unscrew the alternator pulley nut, remove the pulley and small fan. Slide the union over the alternator shaft—bolts pointing away from alternator, then reattach the alternator fan and nut onto the shaft (leave pulley off). The large nut will hold the union in place. Attach the fan clutch assembly to the bolts now protruding from the alternator. Tighten nuts with lock washers in place.
You’ll need:3″ washer, 3/16″ thick, 5/8″ hole.
Electric drill
1/4″ steel drill bit
1/4″ thread tap
1/4″ X 1-1/2″ to 2-1/2″ bolts (4) and lock washers (4)
(To determine length of bolts, stack the fan on top of the alternator with both shafts in line, fan pulley on alternator pulley. Measure length along the two shafts from back of alternator fan to back fan clutch hub. Use this length for the bolts.)
Once you have all the generator components fastened together, mount it on your pole or tower. Insert the pipe on the generator inside the larger pole pipe (or the top of your tower). Use two steel washers together to create a bearing between the generator and tower for a smooth surface for the generator to pivot 360 degrees. Attach the positive and negative wires to the alternator and secure with zip ties, baling wire and/or duct tape on the bracket and along the tower.

Make darned sure you secure your tower in place and even use guy wires if necessary! Deceptively strong winds can quickly topple your tower damage the generator’s parts.
This of course is a very simple design which could be improved upon with a better generator and a better propeller.
More details on this build can be found in the original article at Mother Earth News
All imagen use are from the original article
how do you excite the alternator??
for an alternator to generate sufficiently it has to turn at approx 1200 RPM and above, i cant see it being much help in a normal breeze…
I know it’s possible to modify alternators to have the wiring(not sure if it’s the good word in english) inside made for windmill. GM alternator could be ordered with this special wiring.
Have you actually tried getting it to work? I think you’ll find that it won’t, that silly little fan won’t get going fast enough to actually start charging anything. This tutorial is useless.
I’m sure the solar panels (lots of them) might go some ways towards running an off grid cabin with all the comforts of home. The wind turbine in this article is pure fiction (it might produce a tiny bit in a gale). Build it if you enjoy kinetic art.
that fan is temperature activated it just free wheels until the temperature gets above 160 degrees, that’s what all of the cooling fins are fore .
Remove the clutch from the fan.
This would also only produce DC power, and a converter would suck any juice you made. I took a bike generator and mounted a fan blade to it, and during good winds it will light the little red light on top of my windmill. Noting fancy, but I can tell when the wind is blowing.
so a alternator has to have energy put into it to get it to create energy it dosen’t matter if you spin it at a bazillion miles an hour if you don’t send a charge to magnetize it you will NEVER have any power and you will have a spinning paper weight
I have thought about doing this , a few gears would easily Get the rs up enough to make work , and using DC electronics is an easy solution or just remove the diodes in the rectifier bridge and have ac